Node.js + Express + TypeScript 게시판 만들기 #1 – 개발 환경 구성
Node.js + Express + TypeScript 게시판 만들기 #2 – nodemon 설정과 라우터 분리
Node.js + Express + TypeScript 게시판 만들기 #3 – dotenv 설정과 Controller · Service · Middleware 구조화
Node.js + Express + TypeScript 게시판 만들기 #4 – morgan, helmet, cors로 서버 기본 세팅
Node.js + Express + TypeScript 게시판 만들기 #5 – MariaDB 연결과 DB 환경설정
이전 글에서 MariaDB 연결까지 끝냈다.
이번 글에서 할 것:
- bcrypt 설치 및 비밀번호 해시 처리
- Repository 분리로 DB 접근 분리
- 회원가입 API(
/auth/signup) 구현 - user_id 중복 체크 후 저장
1. bcrypt 설치
>npm i bcrypt
>npm i -D @types/bcrypt
비밀번호는 평문으로 저장하면 안되기 때문에 해시로 변환해야 한다. bcrypt는 그를 위한 라이브러리이다.
2. Repository 만들기 (DB 접근 분리)
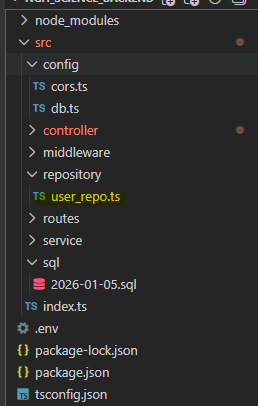
src/repository/user_repo.ts 생성
import { pool } from '../config/db';

export const findUserByUserId = async (userId: string) => {
    const [rows] = await pool.query(
        `select
            id
        from
            users
        where
            user_id = ? limit 1`,
        [userId]
    );

    const arr = rows as any[];
    return arr[0] ?? null; // 결과값이 있으면 arr[0] 반환 없으면 null 반환
};

export const createUser = async (data: {
    role_code: string;
    user_id: string;
    password_hash: string;
    name: string;
    phone?: string;
    email?: string;
}) => {
    const { role_code, user_id, password_hash, name, phone, email } = data;
    await pool.query(
        `insert into users (
            role_code,
            user_id,
            password_hash,
            name,
            phone,
            email)
        values (
            ?,
            ?,
            ?,
            ?,
            ?,
            ? )`,
            [role_code, user_id, password_hash, name, phone ?? null, email ?? null]
    );
};
findUserByUserId : user_id 아이디로 가입된 아이디가 있는지 체크한다. (파라미터 userId)
createUser : data에 필요한 데이터를 파라미터로 받는다. (role_code, user_id, password_hash, name, phone, email)
phone ?? null, email ?? null : 마찬가지로 값이 없으면 null을 넣는다.
3. 회원가입 컨트롤러 구현
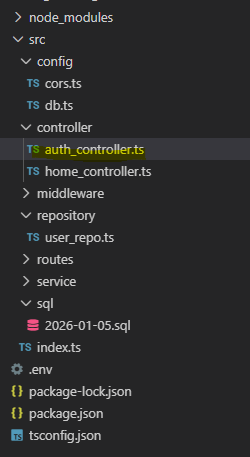
src/controller/auth_controller.ts 생성
import e, { Request, Response, NextFunction } from 'express';
import bcrypt from 'bcrypt';
import { createUser, findUserByUserId } from '../repository/user_repo';

export const signup = async (req: Request, res: Response, next: NextFunction) => {
    try{
        const { role_code, user_id, password, name, phone, email } = req.body ?? {};

        if (!role_code || !user_id || !password || !name) {
            return res.status(400).json({ message: 'role_code, user_id, password, name required' });
        }

        const exists = await findUserByUserId(user_id);

        if (exists) return res.status(400).json({ message: 'user_id already exists' });

        const password_hash = await bcrypt.hash(password, 10);
        await createUser({ role_code, user_id, password_hash, name, phone, email });
        return res.status(201).json({ message: 'ok' });
    } catch (e) {
        return next(e);
    }
};
– if (!role_code || !user_id || !password || !name) { :
회원가입에 필요한 필수값 체크를 하고 없으면 400 에러로 간다.
어차피 화면에서 또 막을 예정이긴 하다.
– const exists = await findUserByUserId(user_id); :
이미 있는 계정이면 마찬가지로 400 return한다.
– const password_hash = await bcrypt.hash(password, 10);
bcrypt로 비밀번호를 해싱한다.
– await createUser({ role_code, user_id, password_hash, name, phone, email });
user_repo의 createUser로 계정을 생성한다.
4. 라우터 연결
src/routes/index_routes.ts 수정
import { Router } from 'express';
import { signup } from '../controller/auth_controller';

const router = Router();

router.post('/auth/signup', signup);

export default router;
/auth/signup 으로 요청이 들어오면 auth_controller의 signup을 호출한다.
아직 front가 없으므로 postman으로 body에 데이터를 담아 요청을 보낸다.
http://localhost:3000/auth/signup
Body
{ “role_code”: “0000”, “user_id”: “admin”, “password”: “1234”, “name”: “관리자”}
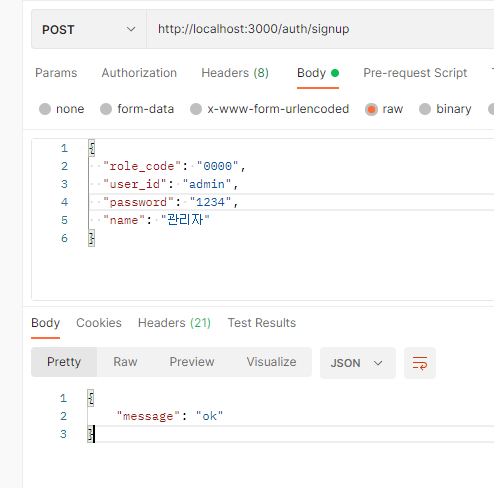
ok응답을 받으면서 정상적으로 회원가입이 된 것을 확인할 수 있다.
다음 글 예고: 로그인 API 구현